Hello everyone, welcome back to this article, you find How to upload any file/image in Laravel using AJAX. As Laravel is one of the best MVC PHP frameworks, it makes the task easy in the majority of projects such as authentication, caches, routers, sessions, etc.
Check doc here.
If we are talking about AJAX, then it will reduce the traffic between client and server, which leads to an increase in the performance, and speed of your Laravel web application. We are using AJAX to upload the file for better performance of the web application.
Without refreshing the page, the file will be uploaded that’s the power of AJAX. Here we have used FormData() an object in AJAX to upload files/images in Laravel with a display of success and error messages on the web page.
Read the full article, so that in the end you will be able to apply this method to your projects. Let’s start step by step.
1️⃣ Write some HTML code for input and upload button
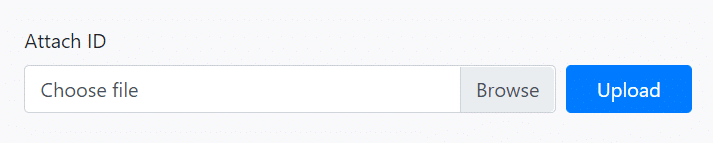
1 2 3 4 5 6 7 8 9 10 11 12 | // ignore the bootstrap classes <div class="d-flex"> <div class="custom-file"> <input required type="file" class="custom-file-input" onchange="id_proof(event, this.id)" id="customFile" name="customFile" /> <label class="custom-file-label" for="customFile" id="customFiles">Choose file</label> <small id="upload_msg" class="form-text" style="display: none;"> </div> <button name="upload" id="upload_id" class="btn btn-primary">Upload</button> </div> |
2️⃣ Add the jQuery code for AJAX call
Using event handlers we can upload the file by using FormData()to add the file data to any name.
1 2 3 4 5 6 7 8 9 10 11 12 13 14 15 16 17 18 19 20 21 22 23 24 25 26 27 28 29 30 31 32 33 34 35 36 37 38 39 | // After choosing the file function readURL(event, input) { var output = document.getElementById(input); output.innerHTML = event.target.files[0].name; } function id_proof(event, id) { readURL(event, id + 's'); } // After click on upload button $('#upload_id').on('click', function(){ var form_data = new FormData(); form_data.append("customFile", $('#customFile').files[0]); $.ajax({ url: '/UploadFile', // router method:"POST", data: form_data, dataType:'JSON', contentType: false, cache: false, processData: false, success:function(data) { if (data.class_name == 'text-success') { $('#upload_msg').addClass(data.class_name).removeClass('text-danger').html(data.message); } else { $('#upload_msg').addClass(data.class_name).removeClass('text-success').html(data.message); } } }) }); |
Now in the next step, we will create one router with the method POST, so that we can pass the request to the controller.
Let’s proceed to the next steps…
3️⃣ Create one router of method post in the Route file
1 2 3 4 5 | // add router which points to one controller method store() Route::post('/UploadFile', 'App\Http\Controllers\SignupController@store'); |
4️⃣ The Final step i.e. To pass the request in the Controller Method
In this step, we are going to upload the file at a particular location (on the server or local) bypassing the request through the router. Let’s see the code.
1 2 3 4 5 6 7 8 9 10 11 12 13 14 15 16 17 18 19 20 21 22 23 24 25 26 27 28 29 30 31 32 33 34 35 36 37 38 39 40 41 42 43 44 45 46 | // Controller method code public function store(Request $request) { // add secure_token_no for secure save (optional) $secure_no = substr(str_shuffle("0123456789abcdefghijklmnopqrstvwxyzABCDEFGHIJKLMNOPQRSTVWXYZ"), 0, 8); $type = 'id_proof_' . $request->secure_no_proof; $form_file = 'customFile'; // Validation of file type $validation = Validator::make($request->all(), [ $form_file => 'required|mimes:pdf,docx|max:2048' // maxsize = 2MB ]); // If Valid if ($validation->passes()) { $file = $request->file($form_file); $new_name = $type . '.' . $file->getClientOriginalExtension(); $path = public_path() . '/uploads/Registration'; // If path is not exist if (!File::exists($path)) { File::makeDirectory($path, $mode = 0777, true, true); } $file->move(public_path('uploads/Registration'), $new_name); // After uploaded successfully return response()->json([ 'message' => 'File Uploaded Successfully', 'class_name' => 'text-success' ]); } // If Invalid else { return response()->json([ 'message' => $validation->errors()->all(), 'class_name' => 'text-danger' ]); } } |

Tada… finally you have uploaded the file. After getting the response JSON, it will go back to the success function (in step2) and show the success label (as shown in the snapshot), if by chance upload is failed then you check also the error that you are getting.
I hope you enjoyed the article and if you found this useful. then share this with your friends or on social media.
If you have any queries, please do ask in the comments section or anything that you want through mail contact.
Thanks.👍
Also read,
- 5 Useful JavaScript/jQuery codes and techniques with examples – Must use
- Conditional Statement in JS – with examples


Thats really good👍
Aw, this was an extremely nice post. Finding the time and actual effort to produce a great article… but what can I say… I put things off a whole lot and don’t manage to get nearly anything done.|
This design is wicked! You most certainly know how to keep a reader amused. Between your wit and your videos, I was almost moved to start my own blog (well, almost…HaHa!) Wonderful job. I really loved what you had to say, and more than that, how you presented it. Too cool!|